TUTORIAL 2 - Tables and Data
We need to populate the database and its tables with actual data in order for this to be interesting.
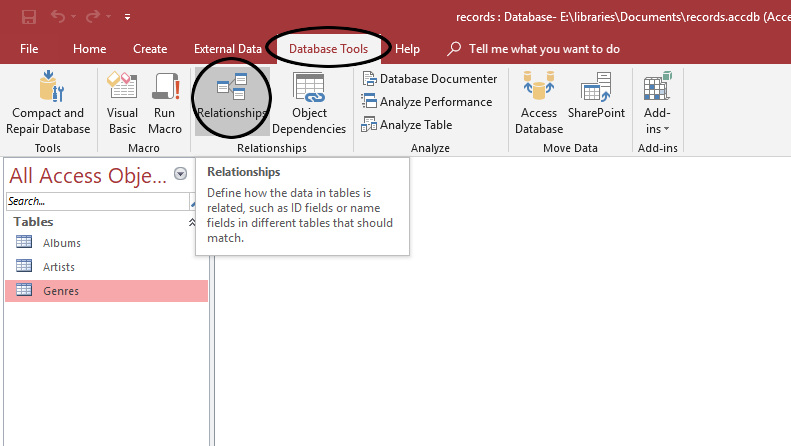
Creating Relationships
First, we need to establish our relationships. This is the feature which defines ralational databases more than any other. Let's see how it's done.
- Ensure that all tables are closed.
- In the Database Tools tab, select the Relationships tool.
- Add all three tables to the Relationships interface by double-clicking on their names.
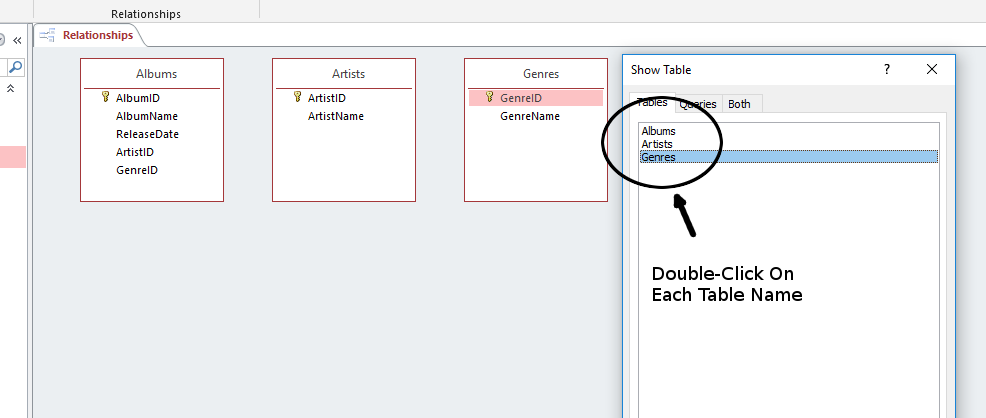
- Close the Show Table dialog.
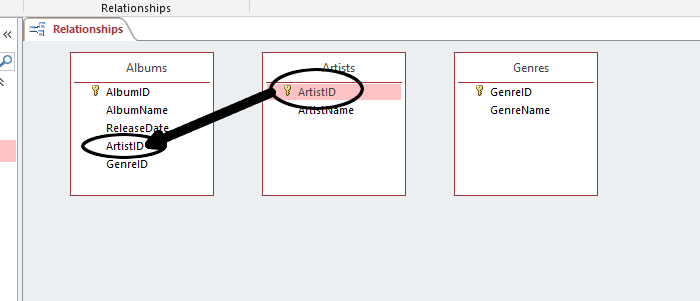
- We want to establish the ID keys of the Artists and Genres tables in their respective Foreign Key fields in the Albums table. To do this: Click and drag the ArtistID field from the Artists table over to the ArtistID field in the Albums table:
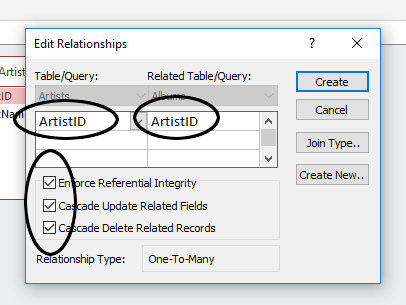
- In the Edit Relationships dialog, check the following options: (What do you think each one means?) A. Enforce Referential Integrity B. Cascade Update Related Fields C. Cascade Delete Related Records
-
Ensure that your dialog looks like this:
-
Click Create. You'll see the link created between the two tables:
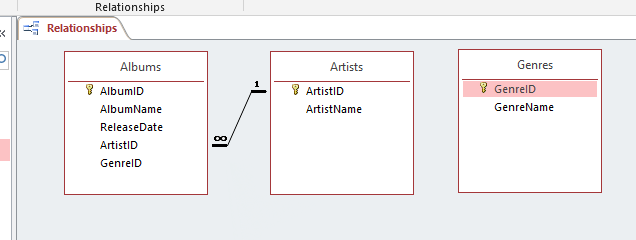
Notice the 1 and the infinity symbol ($\infty$). This signifies that this is a One-To-Many relationship. Simply: An artist can have many albums, but an album can only have one artist. I realize that this is not an accurate reflection of reality (modelling reality is what computers are supposed to do), but it fits our purposes here well.
-
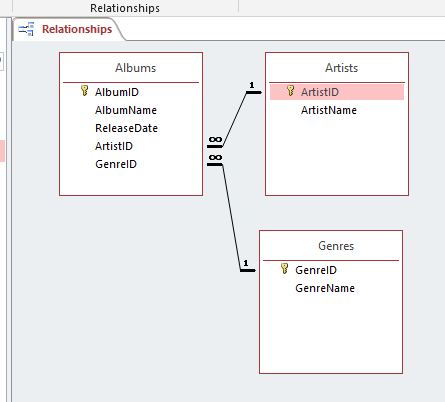
Do the same with the GenreID field in the Genres table and the same field in the Albums table. Be sure to Enforce Referential Integrity, and set both of the Cascade options.
- Save the Relationships and close the Relationship Tools interface by right-clicking on the tab in the window.
Importing some data
Next, we will import some actual data. First, let's populate the Genre and Artist tables. Download the two data files.
Copy them all to your working directory so you don't lose them, and then let's get started.
- First, make sure all of your tables are closed.
-
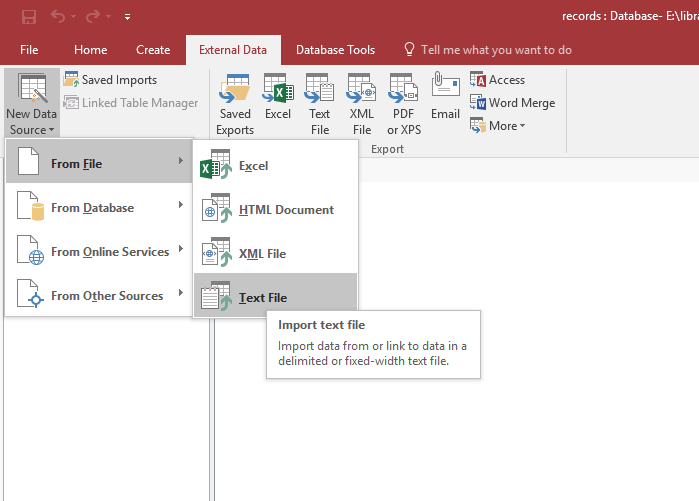
In the External Data tab, in the Import group, find the Data Source tool. You want to import from a file, and specifically, from a text file.
-
The dialog that opens will have several options. Let's go through them.
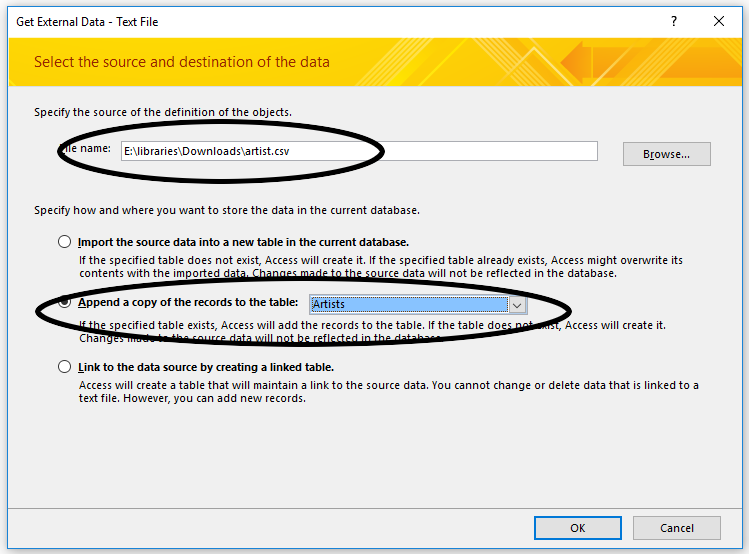
- Under file name, click Browse and find the artist.csv file.
- Check the radio button next to Append a copy of the records to the table and select the Artists table
- Click OK
-
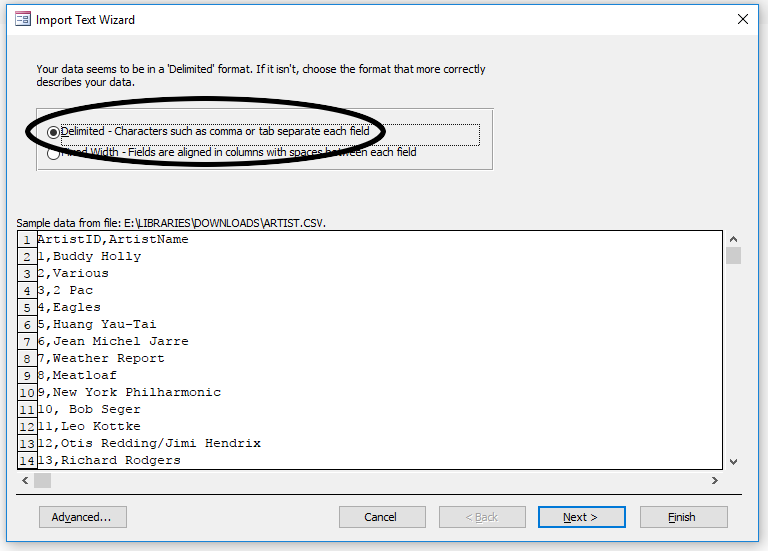
You should see the data appear in a small window at the bottom of the next dialog. Ensure that the Delimited option is selected and press Next.
-
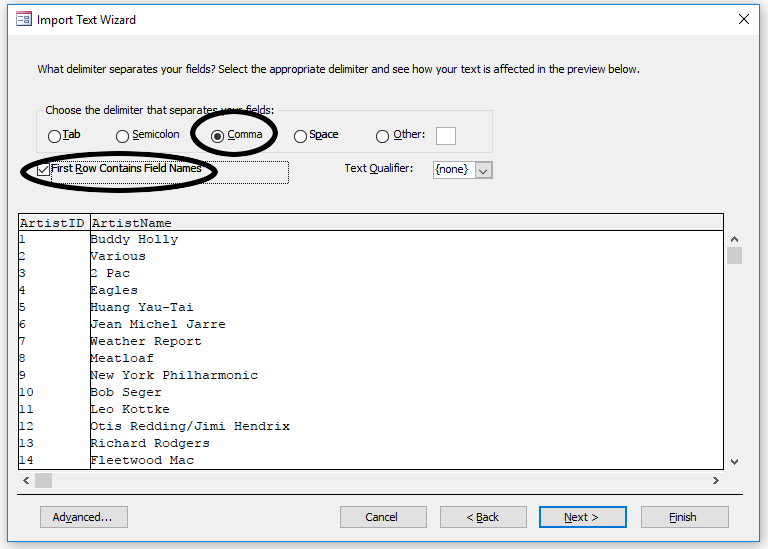
Once again, ensure that the radio button next to Comma is selected. You should see the table split into columns. Also make sure there is a check next to First Row Contains Field Names. Press Next.
- In the final table, verify that you are importing to the Artists table and press Finish. No need to save the import steps.
-
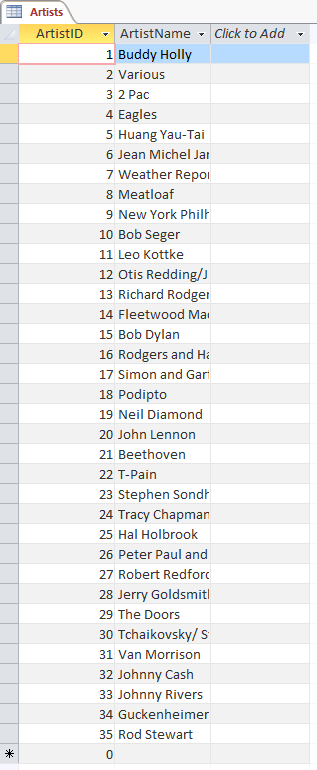
Open the Artists table and observe the results.
-
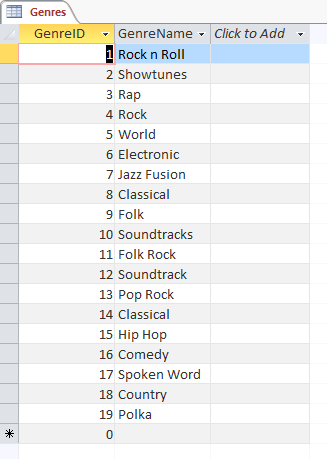
We're going to do exactly the same thing with the Genres table and the genre.csv file. It should look like this when you are done.
Adding some of the album data
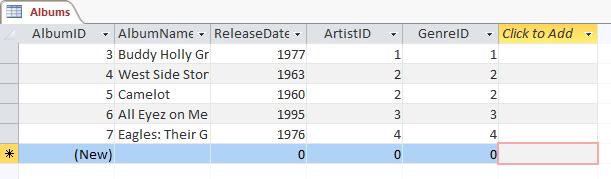
We'll add a album records by hand because it's good to see how it works. So here's five of the albums from my collection in tabular form:
| AlbumName | ReleaseDate | ArtistID | GenreID |
|---|---|---|---|
| Buddy Holly Greatest Hits | 1977 | 1 | 1 |
| West Side Story | 1963 | 2 | 2 |
| Camelot | 1960 | 2 | 2 |
| All Eyez on Me | 1995 | 3 | 3 |
| Eagles: Their Greatest Hits | 1976 | 4 | 4 |
- Close the Artists and Genres tables and open the Artists table.
- Start at the first line, the ID numbers will be automatically generated and all you have to do is type into each field. NOTE: Remember to press Tab to move from field to field in each row.
-
Make sure you get the ArtistID and GenreID fields correctly marked. They should correspond to the correct artist and genres in the other two tables.
Importing the rest of the data
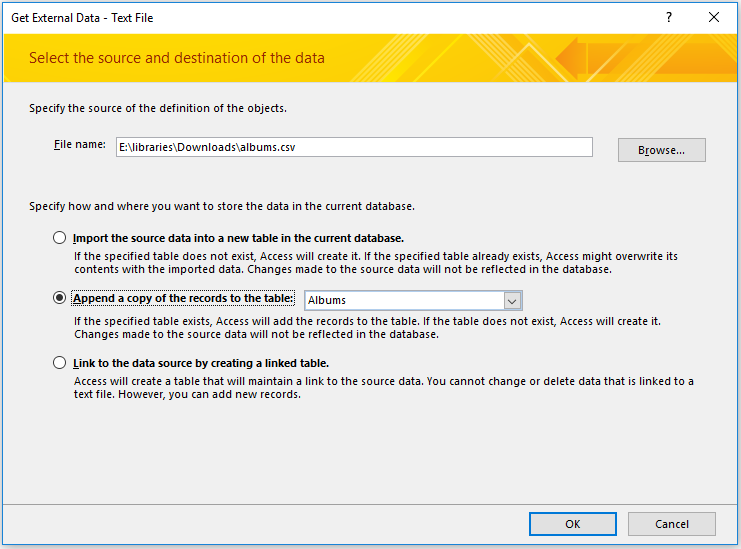
To fill out the rest of the Albums table, we'll use another csv file. The process will be similar to the other two tables
- Close the Albums table. It won't work if the table is open.
- Download the file: albums.csv
- In the External Data tab, select New Data Source and select Text File.
-
Select the albums.csv file and make sure to append it to the Albums table. Press OK
- Make sure to select Delimited and go to the next dialog.
-
Select Comma and check First Row Contains Field Names.
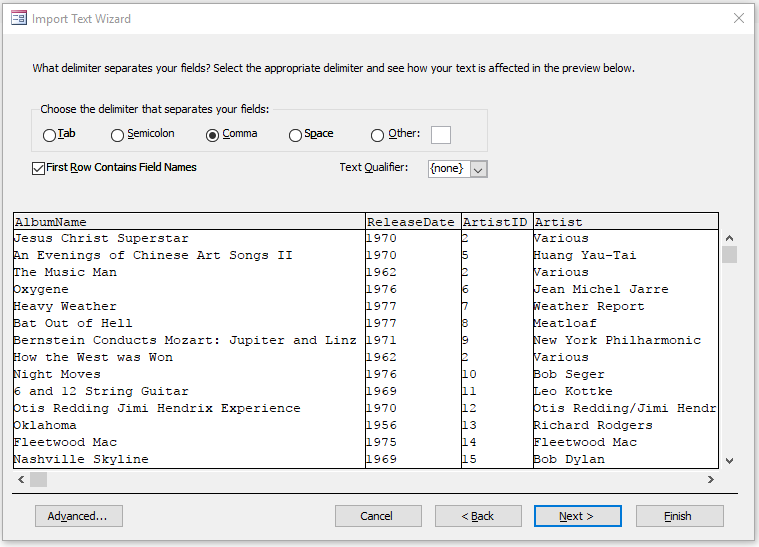
- Click Next, and then Finish.
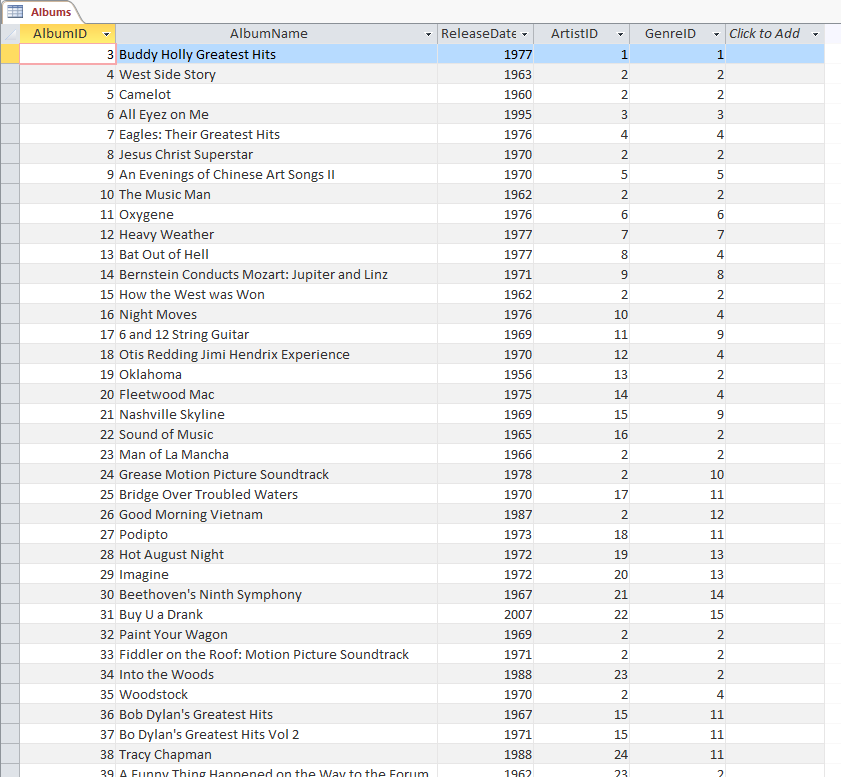
-
Open the Albums table and observe the result:
Save everything, repair and compact your database, and then upload it to the class portal.
In the next tutorial, we will begin querying our database.