TUTORIAL 2 - Formatting, Sorting, and Filtering Tables
One of Excel’s most important jobs is to make tabular data readable and presentable. Some of this will be review from the previous tutorials, and some of it will cover new tools and techniques for making tables look more presentable.
Key Tools and Concepts
- Format as Table
- Excel has a tool for defining a table and formatting in a way that is more readable and useful and easier to read.
- Cell Merge
- Excel has a method for merging multiple cells into one. Useful for delineating one table from another or creating a table title.
Tutorial
The scenario is relatively simple. You are given a spreadsheet with some contact information. It’s a very raw table and is very hard to read in the default fonts. You are to make it presentable so that it can be printed or exported to a pdf for distribution within your company.
Download the Start File
- Download the Start File
-
Open the start file in Microsoft Excel. Acquaint yourself with the contents of the file.
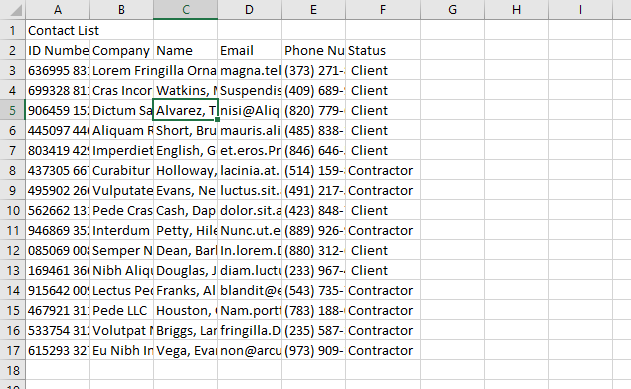
Resize columns
The first and most obvious problem is that the columns are too narrow. There are a couple of ways to accomplish this. Let’s look at a few of them.
-
The most obvious way to resize columns is to simply click and drag the border between two columns to resize that column. So Click on the border between columns A and B and drag it to the right until you can see all of the text in column A. You may have to adjust it a few times to get it right.
-
Try this next: hold the mouse over the border between the column headers for B and C. Double-click the left mouse button. The column will instantly resize to accomodate all of the content in the column.

-
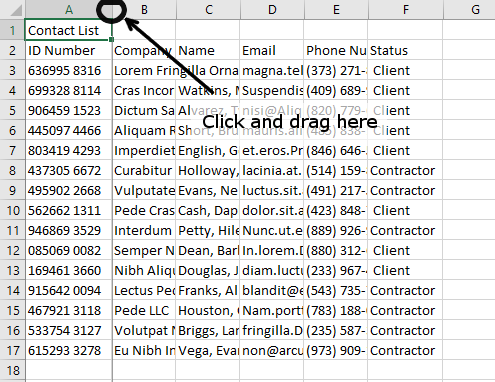
You can actually resize all of the columns at once and automatically. First, select columns C through F by clicking and dragging through their column headers.

Then, Double-click on the border between any two of these columns. All four columns should automatically re-size to accomodate their contents.
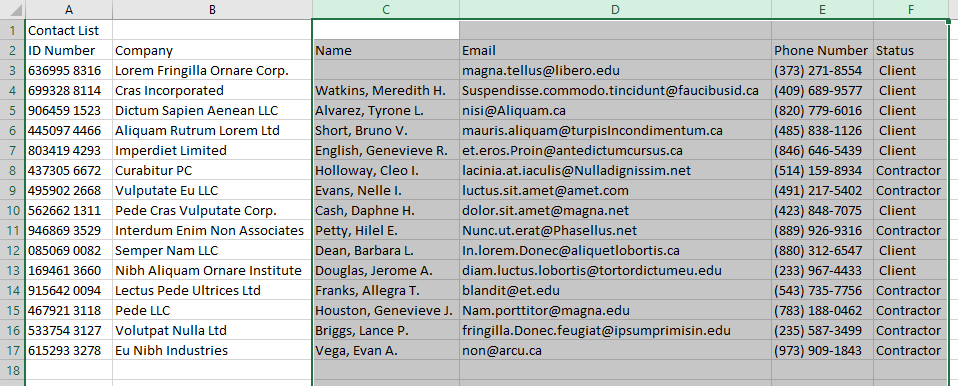
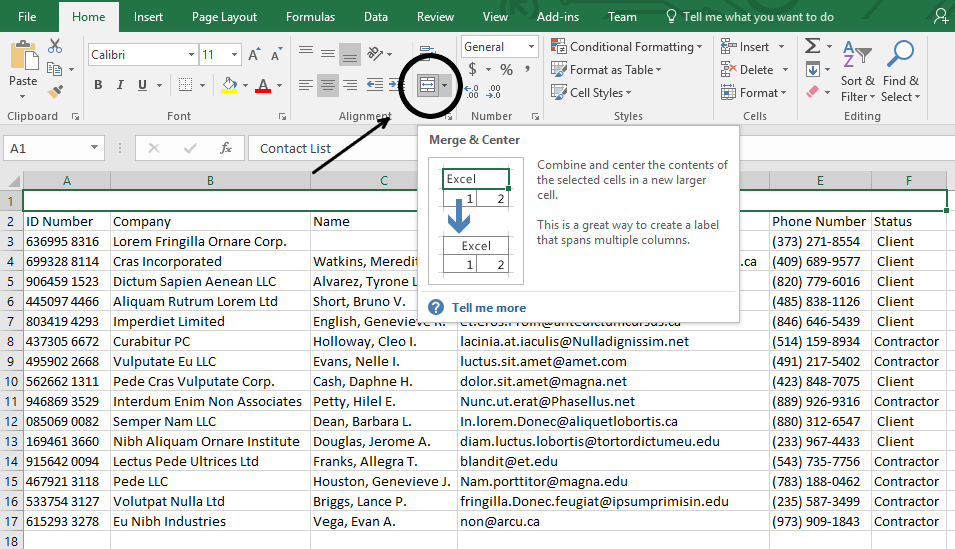
Create a Title
Cell A1 contains the title for the table. But wouldn’t it be nice if it were centered across the entire table?
-
Select cells A1 through F1.
-
In the Home tab, Alignment group, find the Merge & Center tool. Click it. The result should be one single cell across the top and the title centered within it. Note, that when you merge a group of cells into one, they retain the name of the top-left-most cell, in this case, A1.
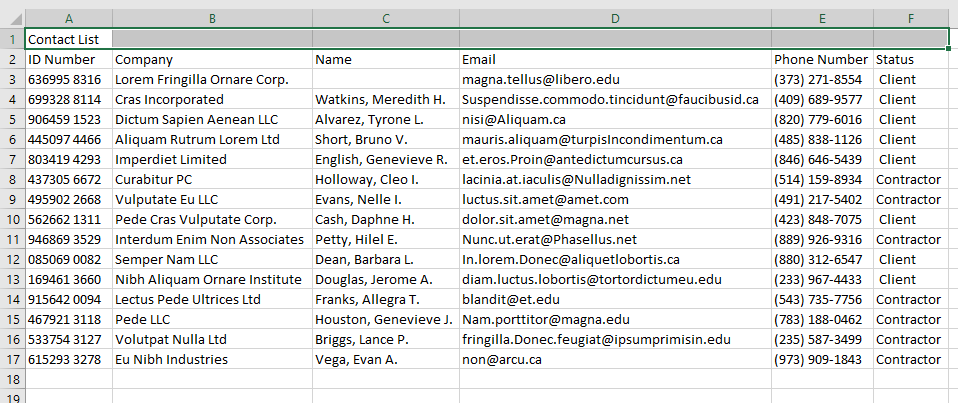
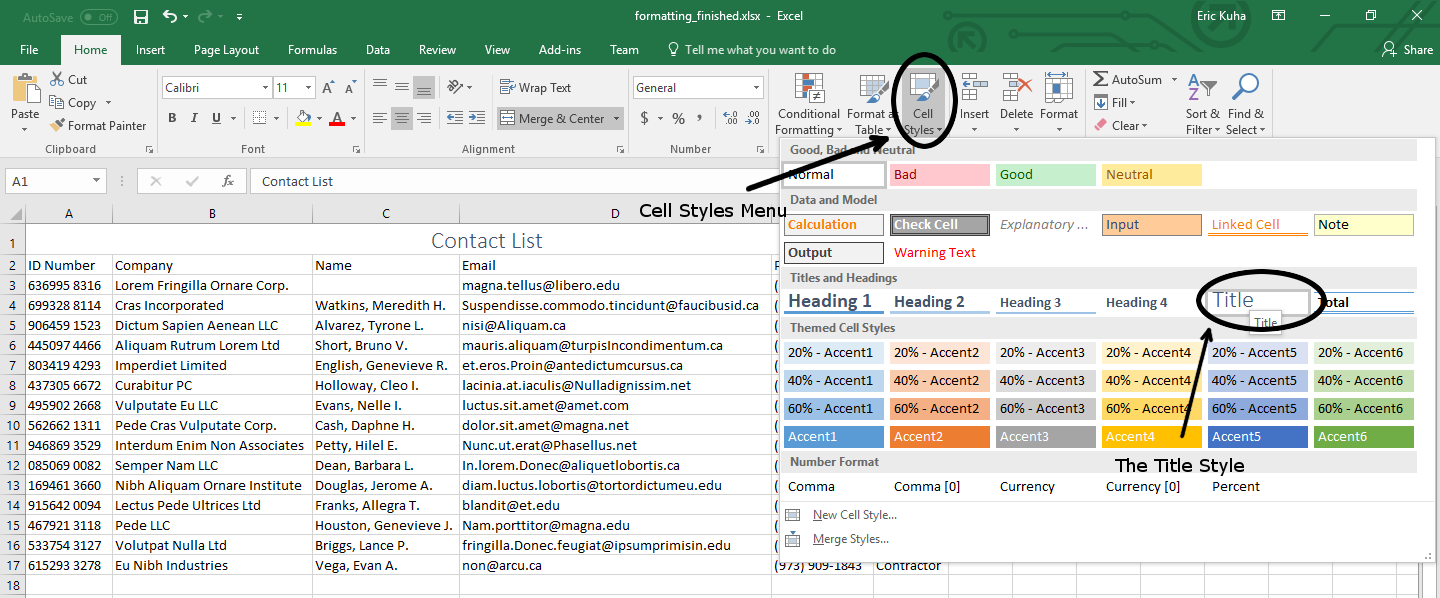
Quick Formatting
One of Microsoft Office’s primary strengths, from a formatting standpoint, is its extensive collection of quick formatting options. We can format the title easily enough using cell styles that are similar the styles built into Word. However, we can also format the table quickly, too, without a lot of fiddling. This has two primary effects. First, it makes the table more readable and easier to understand. Second, it tells Excel that that this is a table and it will treat that data as a cohesive unit when it comes time to make charts or do other data analysis.
- Select Cell A1, the table title.
-
In the Home tab, under Styles, click Cell Styles to open the menu and select the Title style. It changes the font size, color, and typeface for the title and sets it apart from the rest of the table data, making it easy to see.
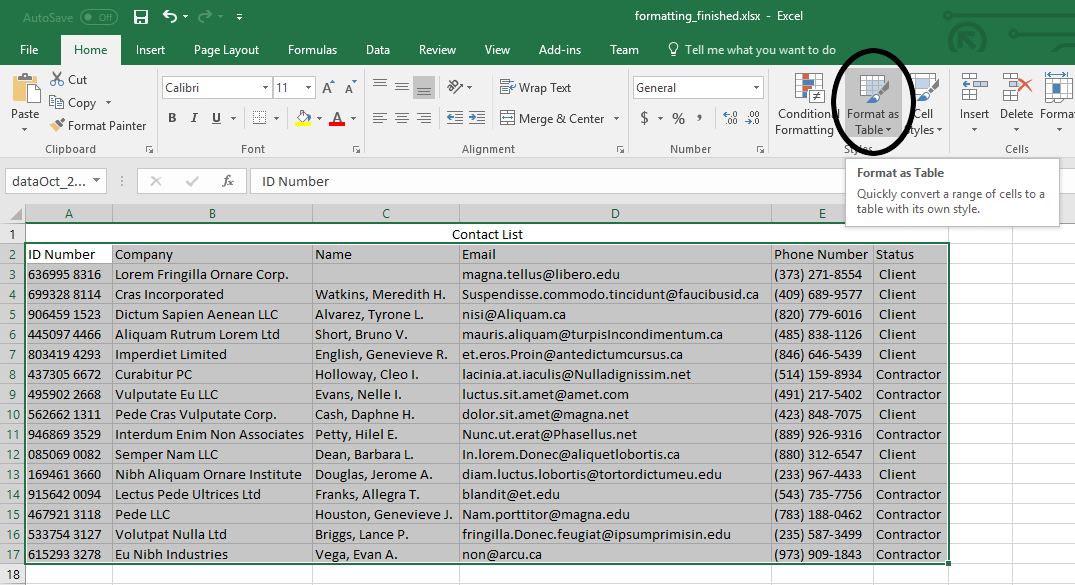
- Next, select the table. Specifically, select the cell range A2:F17.
-
Again, in the Home tab, under the Styles group, click Format as Table. This will open a dialog that has a number of table styles to choose from.
-
Choose any style you like, but ensure it appears to have banded rows and a bolder header row.
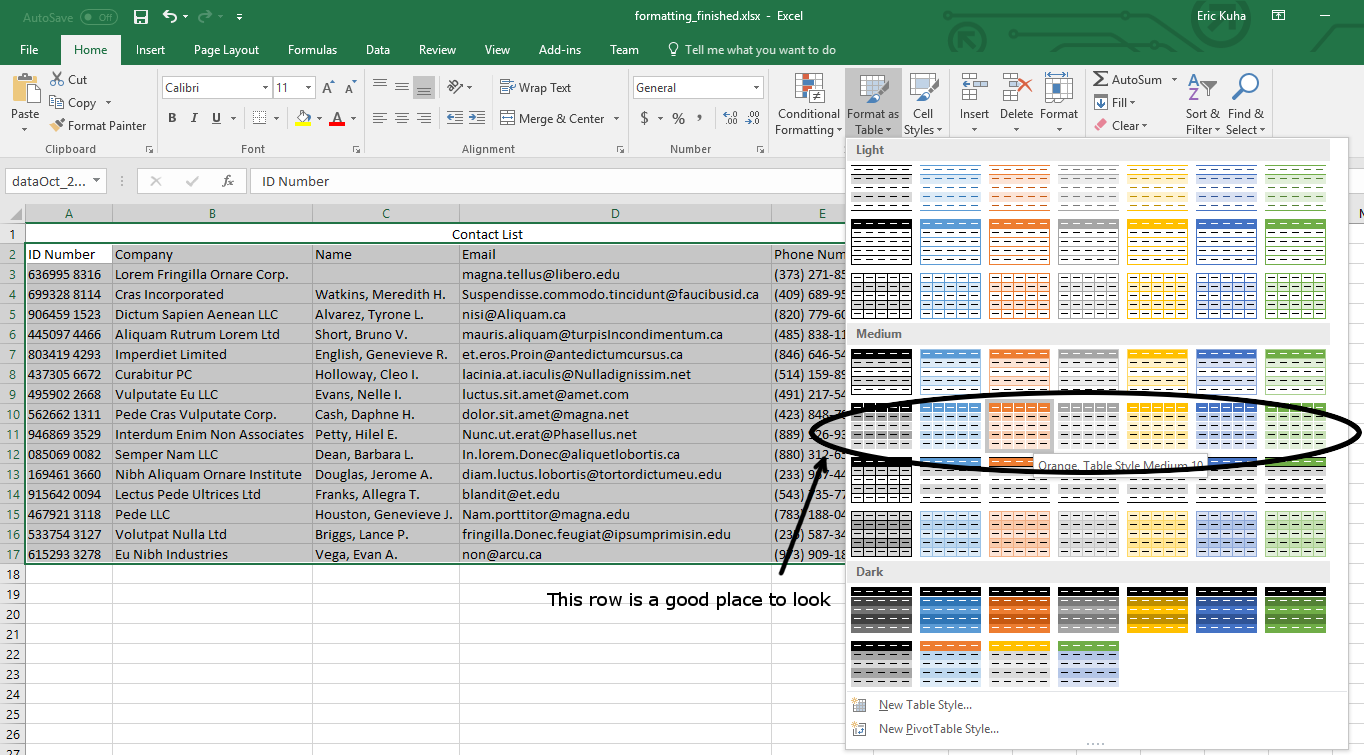
- When you select and click on a style, a dialog will open. Put a check in the box that says My table has headers. This is important.
- Press OK and observe the results. Note: if any other dialogs open, just press OK. This is an artifact of how I generated the data and pasted it into the spreadsheet. Ignore it.
Filtering and Slicing
There are a number of things that you can do with a table that has table formatting applied. With the cell selector somewhere inside the table, go to the Table Tools: Design tab on the Ribbon and make a note of some of the tools you see here. You can change the style here, select banded rows and/or columns, emphasize the headers, total rows, and even integrate with software like Sharepoint for collaborative projects or company memos and the like.
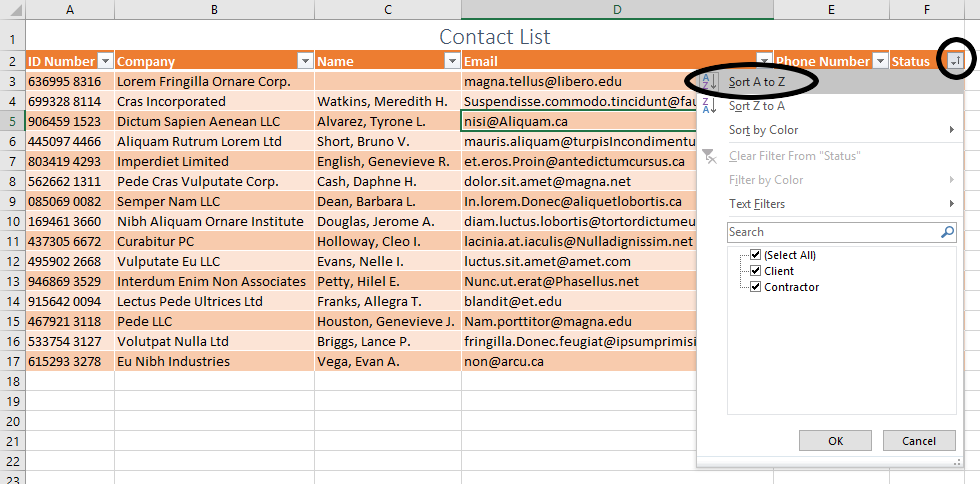
Of particular note is the ability to sort the table in interesting ways. For example:
- Next to each column header, you should see a little down arrow button. Click on the button next to the Status header, cell F2.
-
Click Sort A to Z. Observe that the table is now sorted between Clients and Contractors. You can do the same sorting with any of the table columns and it will not corrupt the integrity of the table itself. It’s a very handy feature, especially when dealing with very large data sets.
-
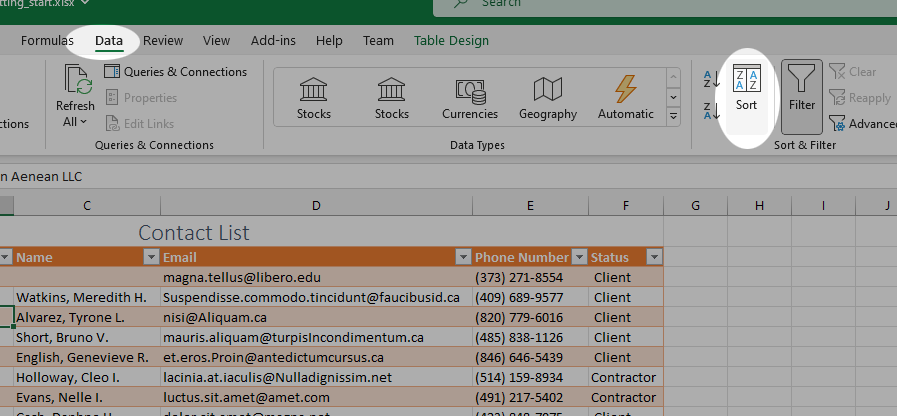
You can also sort a table on multiple fields. In this context, we can use the word field interchangeably with column. So, in the Data tab, and the Sort & Filter group, click the Sort button.
-
Next, in the first sort level, in the Column section, select Status and leave the rest the same. This will force the table to sort, alphabetically, by that column. Next, Click Add Level, and select settings to sort the table alphabetically by Name.
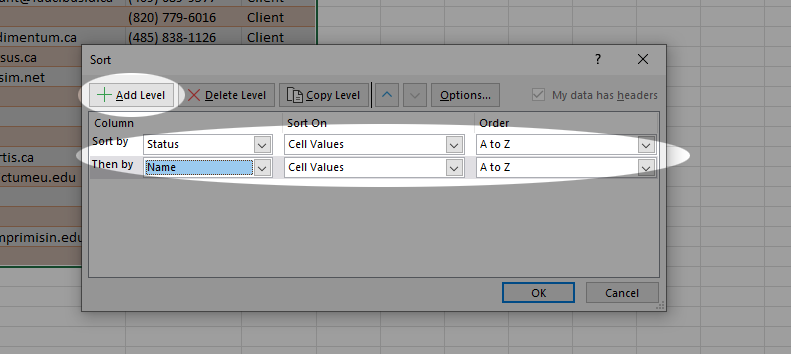
Click OK and observe the results.
You can also use this tool to filter out entire categories of rows, but let’s try another method of filtering.
-
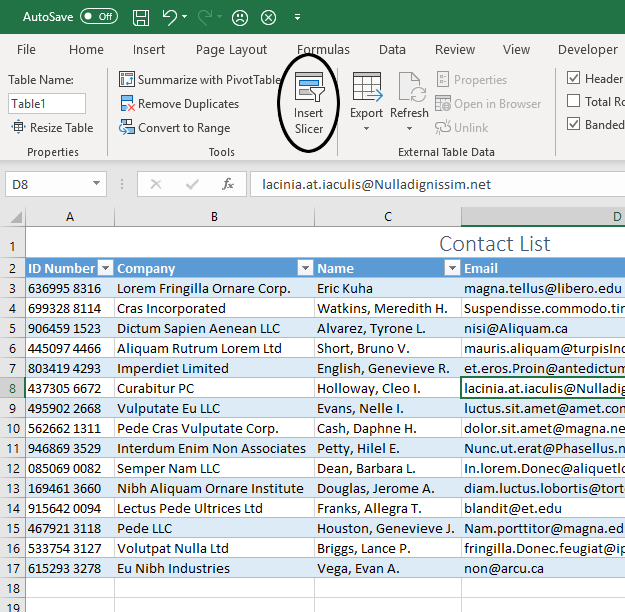
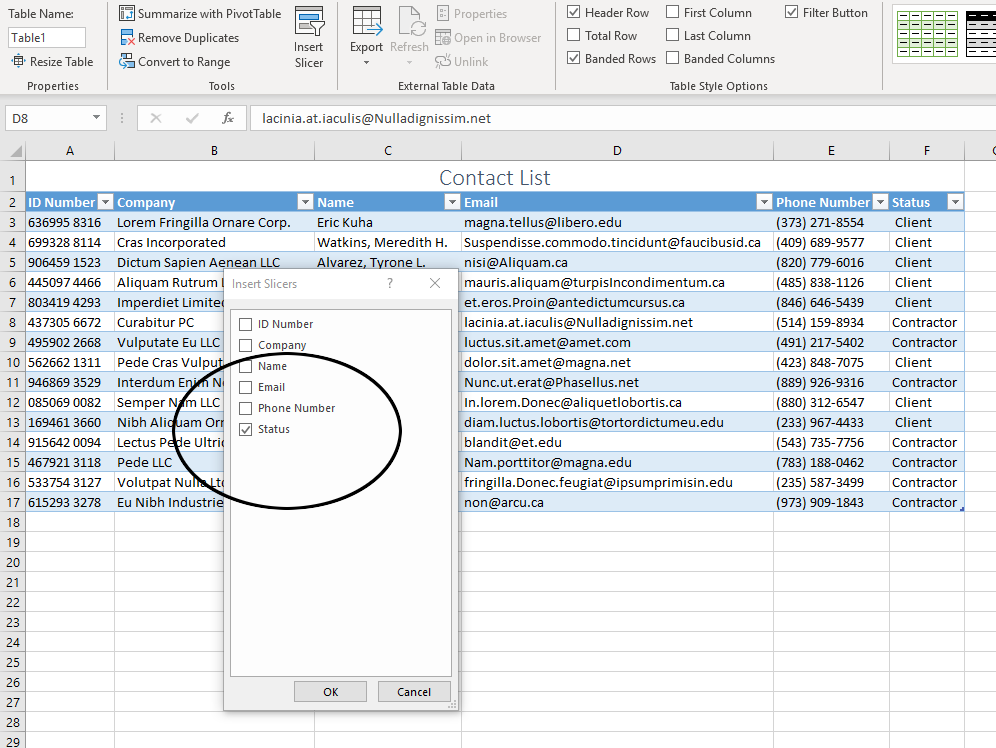
With at least one cell in the table selected, in the Table Tools: Design tab, click the Insert Slicer tool.
-
In the dialog that opens, put a check in the box for the Status column.
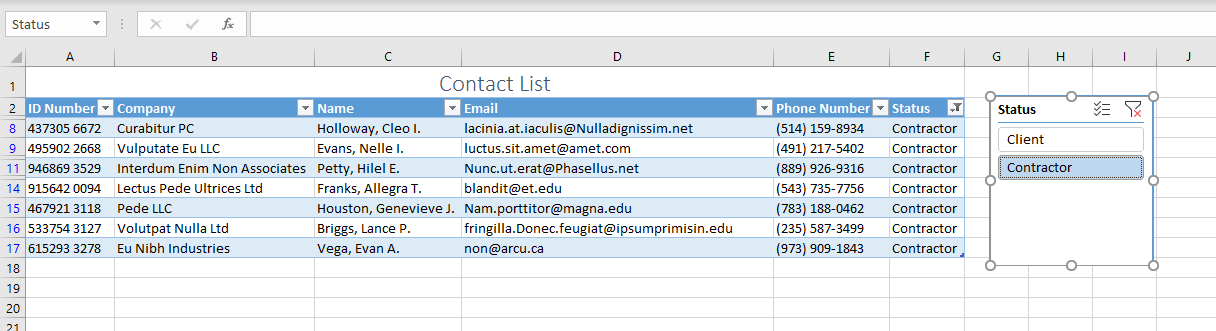
-
Move and resize the slicer to an appropriate location and then play around with it, to see how it is used to filter out entire categories of data.
Conclusion
Tables are a highly versatile way to add additional functionality to data by explicitly defining a range of data as a table. This can allow you to sort, filter, format, and otherwise organize data to enhance its usability.