.svg)
Microsoft Word is a word processing application that can help you create professional documents, fliers, resumes, and much more.
Word at a Glance
The Microsoft Word Interface
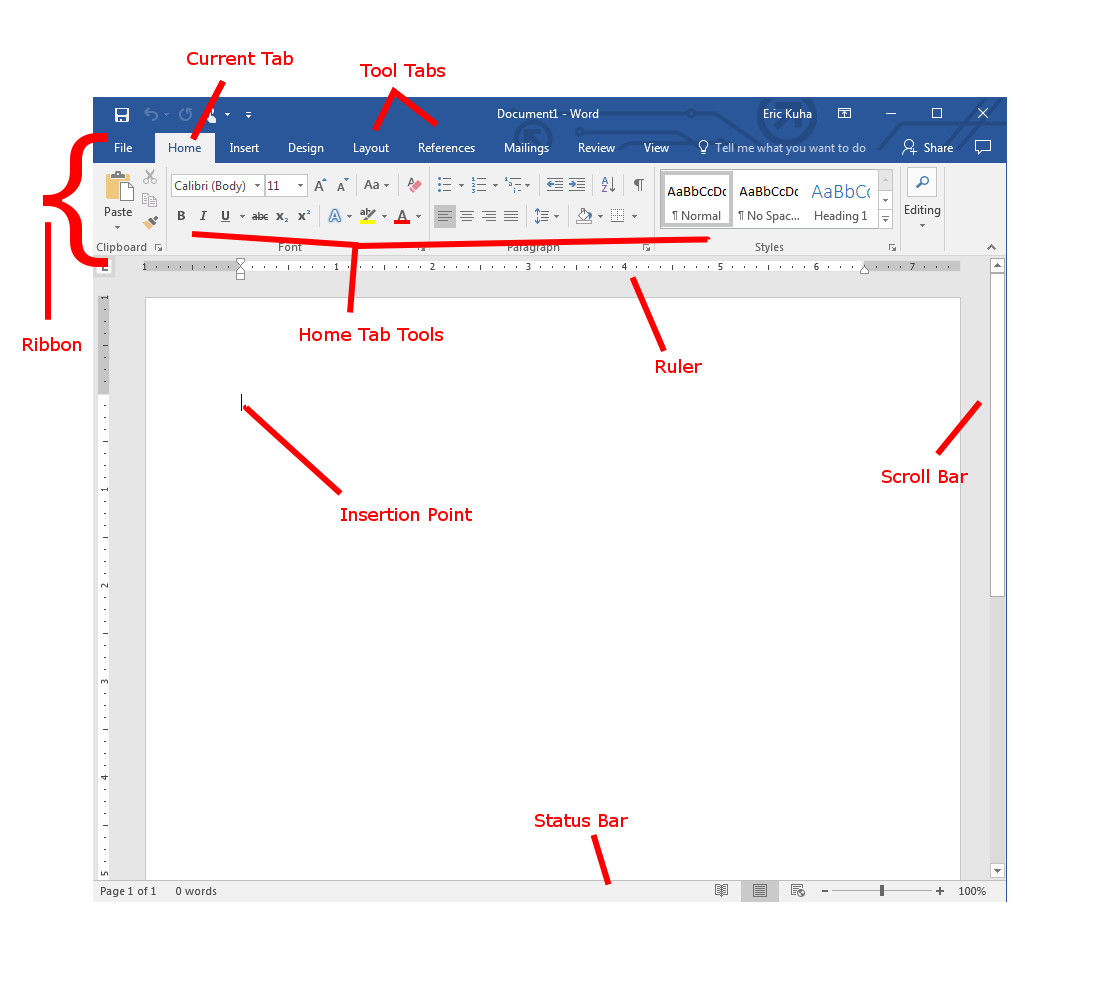
- Ribbon
-
The Ribbon is your main tool belt for Word. It is divided into separate tabs which contain tools for different tasks. Every major tool for the app can be found in one of these tabs. Take some time to explore each tab and see if you can figure out what the tools there do.
- Tool Tabs
-
Each tab has a specific kind of task that it specializes in. The Home tab has your most commonly used tools. The Design tab has tools for changing the look, feel, and layout of your document. The References tab has tools relating to citing sources and crafting bibliographies.
- Current Tab
-
The current tab is always highlighted and easily distinguishable. Above, the Home Tab is highlighted. This is where the most commonly used tools are arrayed.
- Home Tab Tools
-
The Home Tab has tools for changing basic text styling, such as size, typeface, bold or italic, and theme-based styles (more on this later). It also has useful editing tools including clipboard access and other related tools.Notice that the tools here are broken up in to groups of related tools. Understanding the logic of the tabs and groups within them will help you gain mastery over the Word interface.
- Ruler
-
The rulers give you a visual guide for where things lie on the page. You can easily see how text, images, and diagrams line up.
- Insertion Point
-
This is one of your most important tools. This is the spot where presses on your keyboard will insert letters and other text. It typically blinks, patiently, waiting for your input.
- Status Bar
-
At the bottom of the window is a row of useful information and tools that can be seen at a glance or activated with a click.
- Scroll Bar
-
As with nearly all modern windows-style interfaces, a scroll bar allows you to move up and down through the document.
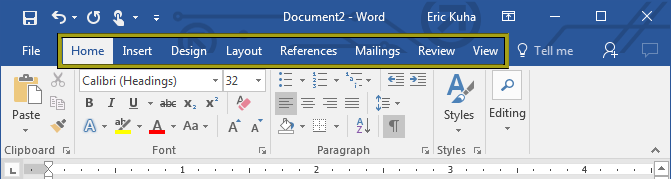
The Ribbon
The Microsoft Word interface is centered around the Ribbon. This is your toolbelt and learning where you can find the tools - especially the ones you will use frequently - will be important to growing comfortable with the software.
-
The Ribbon is tabbed. So under each tab, you will find tools categorized for different aspects of the word processing workflow.
-
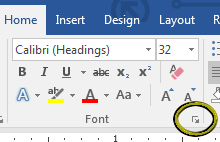
Each tab is further divided into groups of related tools. For instance, the Font group on the Home tab has tools for manipulating the typeface of the text in your document.

-
Note, some groups also have a small triangle at the bottom right corner which will open dialogues with still further tools, features, and options.
Quick Access Buttons
At the far top left are a set of tools that are so vitally important that they are visible no matter which tab you are currently using. From left to right, they are the tools to save, undo, and redo/repeat. Together, they are called the Quick Access Buttons.
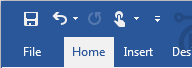
- The save button is one of several ways to save your data so you don’t lose it.
- The undo button allows the user to undo the last action and continue to move backward through an entire record of actions leading back to when the document was opened.
- The redo/repeat button allows the user to “undo an undo” in case you decide you like it better how it was. And it can also allow you to repeat certain actions.
The Ruler
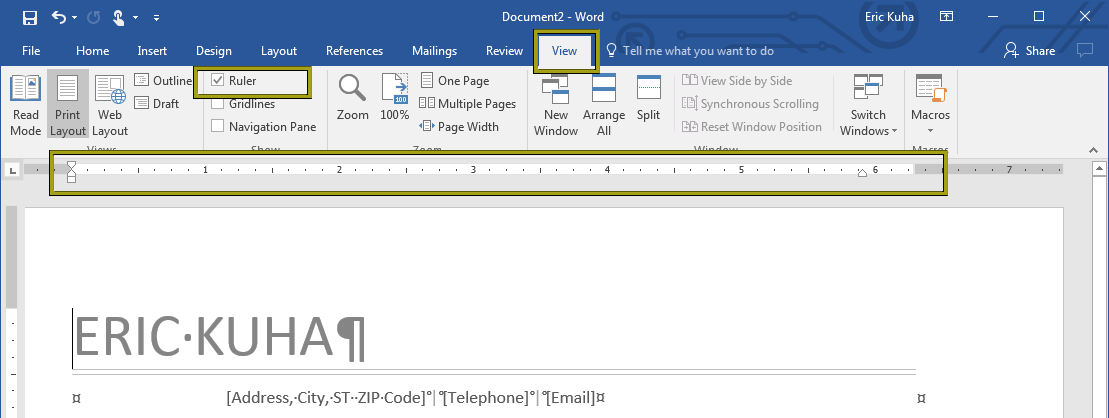
If the Ruler is not visible, go to the View tab and look for the Show group. Put a check in the empty box next to the ruler by left-clicking on it. Get used to having it on because it will become very useful later on.
Non-Printing Characters
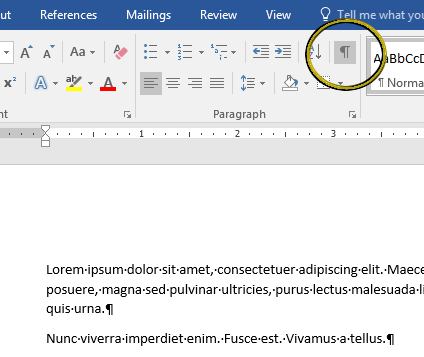
Try this: Type some text. A few sentences. Doesn’t matter what they are. Then look on the ribbon and ensure that you are currently at the Home tab. At the top right of the Paragraph group, you will see a button that looks like a paragraph symbol: ¶. Activate the button. It will become shaded to show that it is active. This tool shows and hides all non-printing characters. If you work with this activated, you will have a much better idea of the content of your work because it shows all “whitespace” characters so that you can more easily control how Word interprets your work. You’ll notice dots between words where your spaces are. And you’ll notice the paragraph symbol, ¶ at the end of every paragraph.
There are two reasons this is important. One, you should understand that white space is also text and is part of the structure of the document. And two, having a working understanding of how Word interprets paragraphs is one of the key aspects of learning how to bend Word to your will. For the most part, text that is separated by only spaces is interpreted by Word as a paragraph. It is sort of like Word’s basic unit of text. Every time you press the enter/return key, Word creates a new paragraph.
Next up
Spend a while messing around with the Word interface. Look inside each tab and see what tools are there. Try to use them and see what they do. Don’t worry, you can’t really mess anything up; every time you open a new document, it will be back to its default settings.
The next section is a tutorial for creating, editing, and saving a Word document.