Tutorial 6 - MLA Style
One of the things you’ll be asked to do as a college student, is to write essays. It’s just a fact of life. As part of this, you’ll be asked to adhere to some formal style guide. There are a number of style definitions out there. If you’re in a STEM field, you might be required to follow the styleguide of the American Psychological Association (APA), and if you’re in a humanities course, you might be asked to adhere to the Modern Language Association (MLA) style.
This tutorial highlights some of the key features of the MLA styleguide and how to quickly convert a Word document in its default form into something that adheres fairly strictly to this styleguide.
Tutorial
Getting Started
Let’s look at a list of the basic requirements of MLA style. These are the things we will need to do to the start file.
- Double-space the entire document
- Remove paragraph spacing from the entire document
- Increase the font size of the entire document to 12 points.
- Indent the first line of each body paragraph to .5 inches from the left margin
- Add the page number preceded by your last name in the upper-right corner of each page. Omit this from the first page.
First, download the Start File.
- Press Ctrl-A to select the entire document.
- Go to the Home Tab on the Ribbon.
-
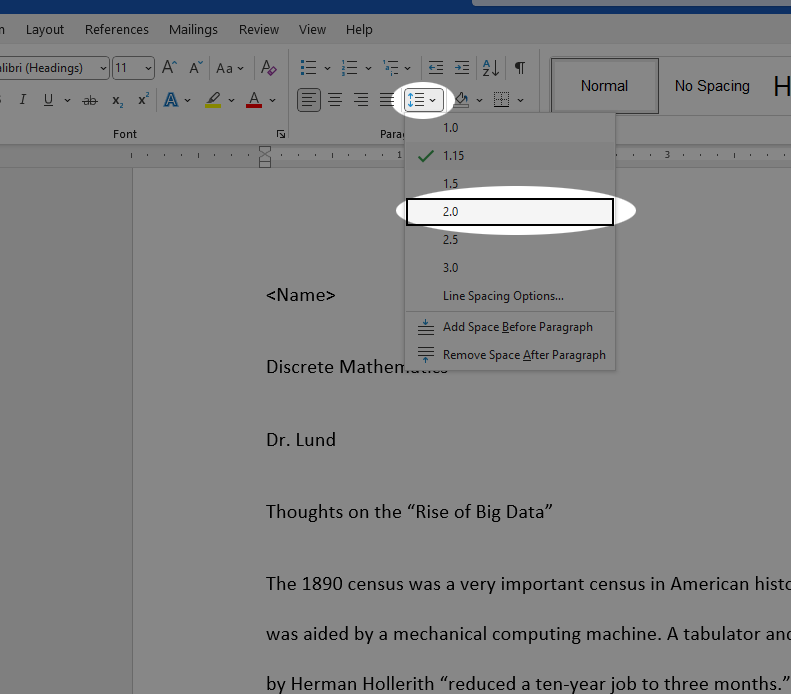
In the Paragraph group, click the Line and Paragrah Spacing button and click 2.0.
-
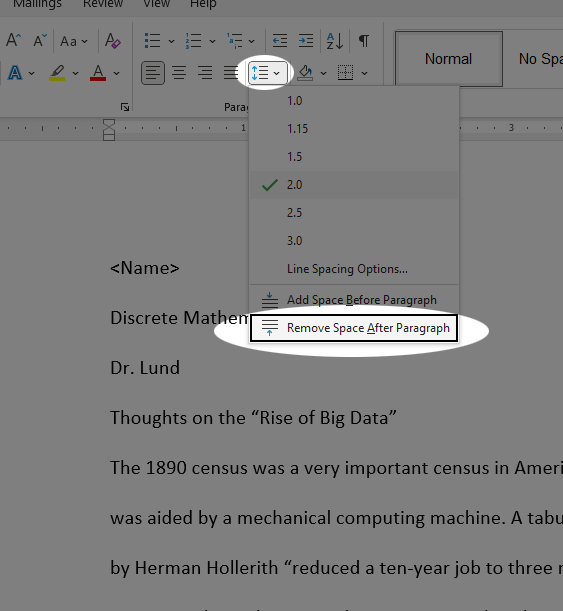
Again, click on the Line and Paragraph Spacing button and click Remove Space After Paragraph. Now everything is double spaced.
- Lastly, with everything still selected, in the Font group, click the change the font size to 12. You’ll notice that the document is now considerably longer, but this is all so that you don’t strain your English instructor’s eyes.
- Next, replace the name at the top of the page with your first and last name.
-
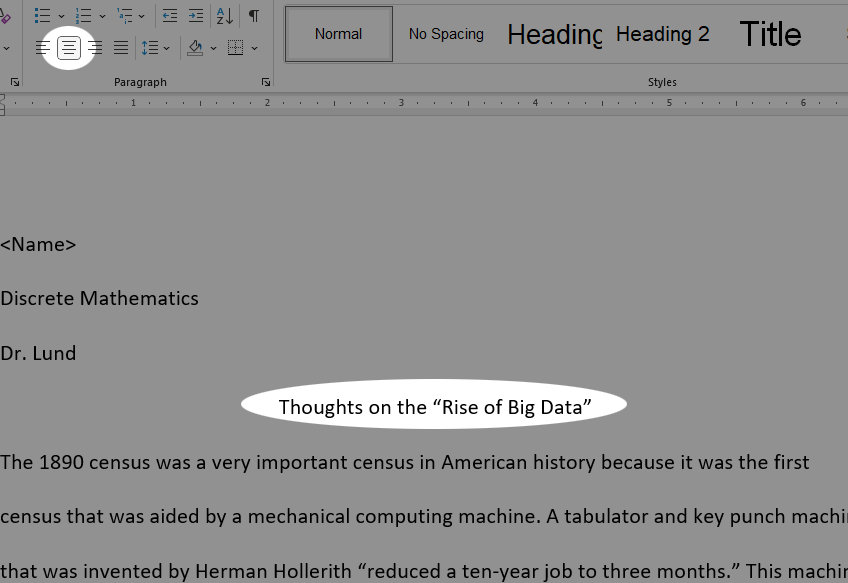
Center the title Thoughts on the “Rise of Big Data by clicking somewhere in the title and then click the center tool in the Paragraph group. The document should be looking like this:
Indenting Paragraphs
Next, we want to indent the first line of every paragraph using the indent widget: 
- Place the insertion point at the beginning of the first paragraph of text (The 1890 census was a very important census…).
- To select all of the text in the body of the document, hold the ctrl and shift keys and press the end key. Alternately, simply use the mouse to click and drag to select all of the text.
-
Ensure that you have the rulers enabled and observe the indent widget. Click and drag the top part of the widget
 to the right by .5 inches. As you do this, you will notice that the first line of each visible paragraph in the selection moves with you. It should look like this:
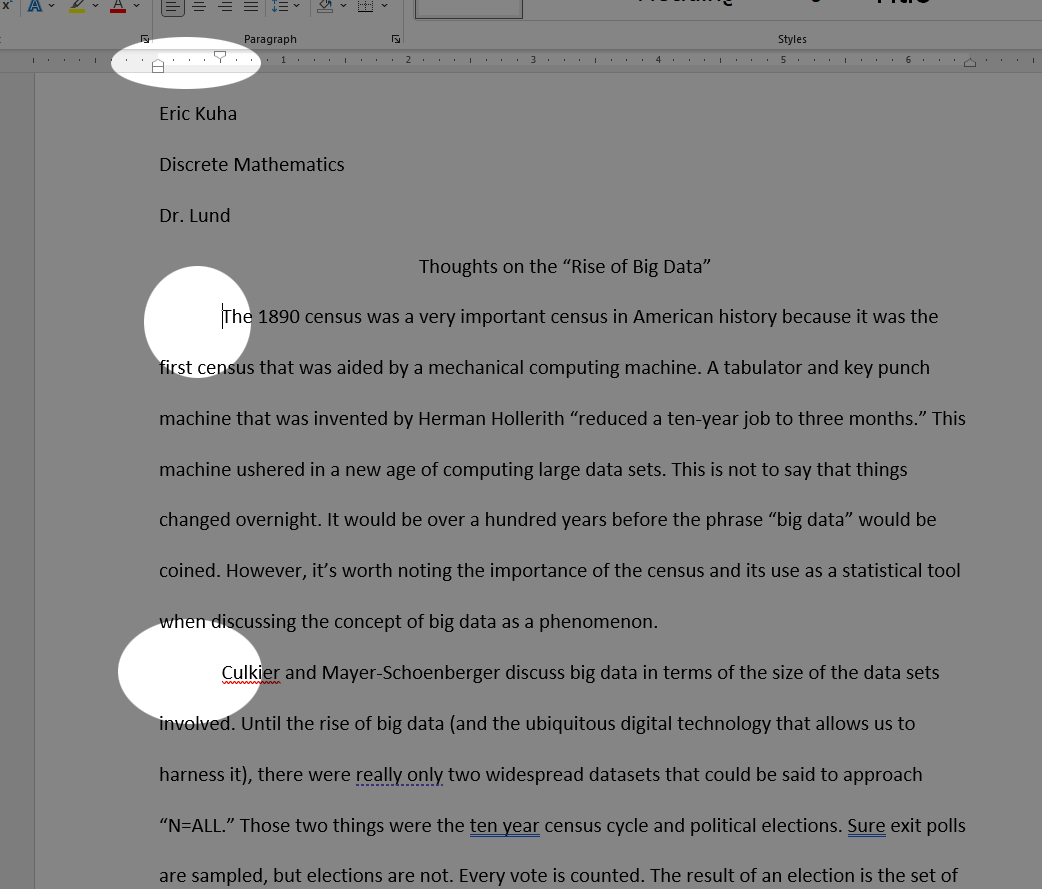
- Scroll through the document to ensure that all main body paragraphs are indented.
Page Numbers
We’ll add page numbers in the MLA style to the top of each page except the first one.
- To add Page numbers, click on the Insert tab and in the Header & Footer group, select the Page Number menu and select the Top of Page.
-
Select Plain Number 3.
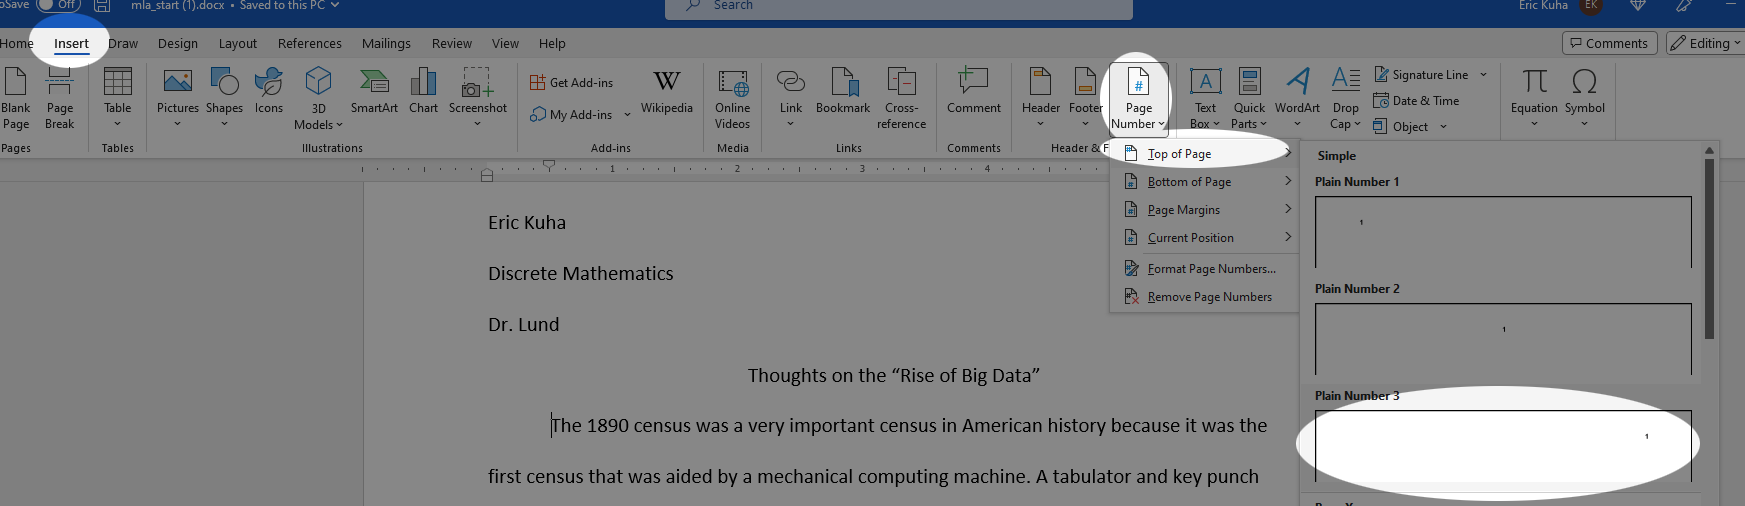
- The insertion point is now blinking to the left of the page number. Type your last name and press Space.
-
Since MLA style does not require a page number on the first page, verify that you are in the Header & Footer Tools tab, and check the box that says Different First Page. The result is that the first page header will be blank and the rest of them will have your last name and the page number:

Citations
Now, we are going to go through this and create some citations and a bibliography. Remember, that there is a certain amount of wiggle room when it comes to citations, but there are some hard and fast rules and you should consult your English instructor if there are any questions about the correctness of Word’s citations.
- Select the References tab.
- In the Citations & Bibliography group, ensure that the selected style is MLA Seventh Edition. It may default to APA, and we don’t want that for this tutorial.
- The first citation we want to add is a book called “Herman Holerith: Forgotten Giant of Information Processing”. Click at the end of the quote that says “reduced a ten-year job to three months.”
-
In the Citations & Bibliography group click Insert Citation and then Add New Source.
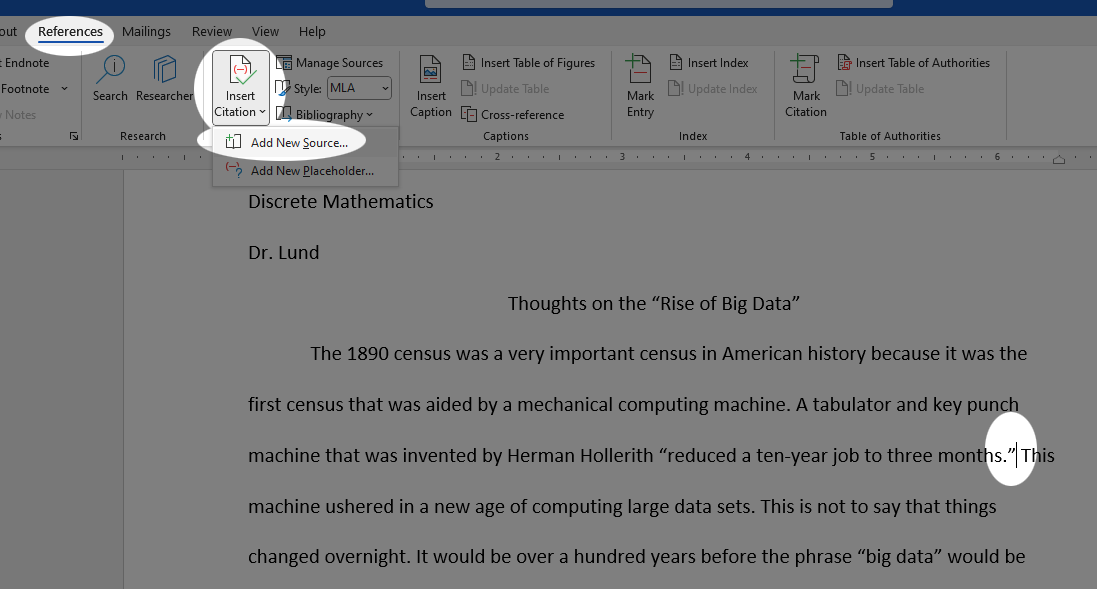
- In the Type of Source box, select Book.
-
Fill out the form with the following information:
Author Geoffrey Austrian Title Herman Hollerith, Forgotten Giant of Information Processing Year 1982 City New York Publisher Columbia University Press 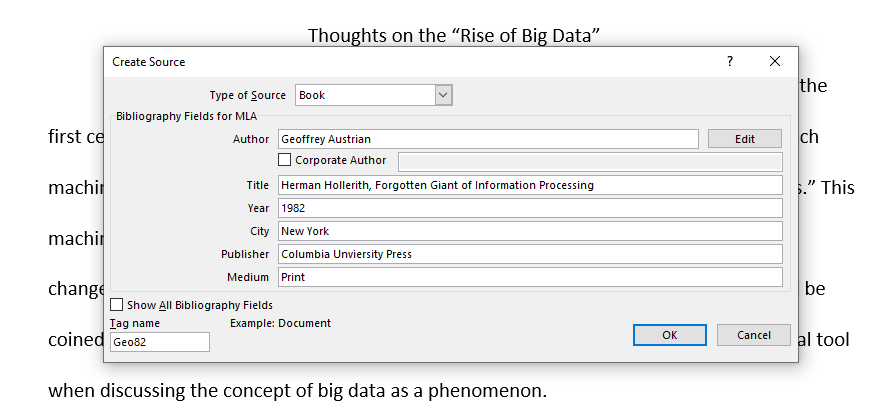
You can omit Medium as it is no longer required by the current edition of the MLA styleguide.
- Press OK and see the parenthetical citation that is automatically generated.
-
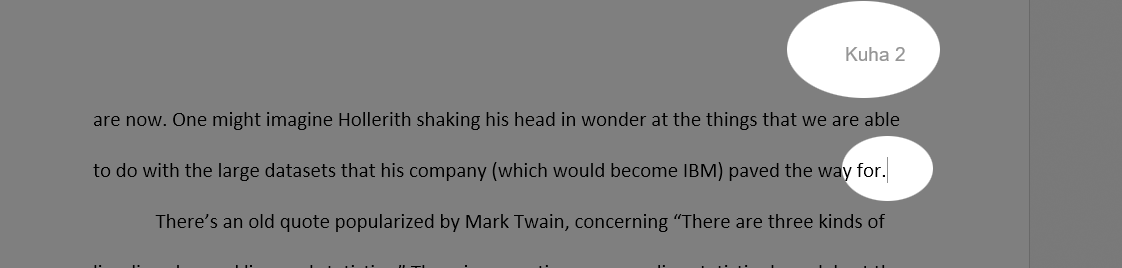
Now, at the top of page 2, find the end of the line that says “…paved the way for.” and place the insertion point there.
Click Insert Citation.
-
This will be another book. Fill in the form as follows:
Type of Source Book Author E.W. Pugh Year 2009 Title Building IBM: Shaping an Industry and its Technology Publisher MIT Press Press OK and it will insert the parenthetical citation.
-
Next, place the insertion point at the end of the paragraph that ends “…save significant amounts of money and time.” Click Insert Citation. Fill in the form as follows:
Type of Source Document From Web site Name of Web Page Why Big Data is on the Rise Name of Web Site Foreign Affairs Author Kenneth Neil Cukier and Viktor Mayer-Schoenberger Year 2013 Year Accessed 2022 We are going to omit the URL because it’s easy to find and not required by the specification any more. Click OK and it will once again insert the parenthetical citation.
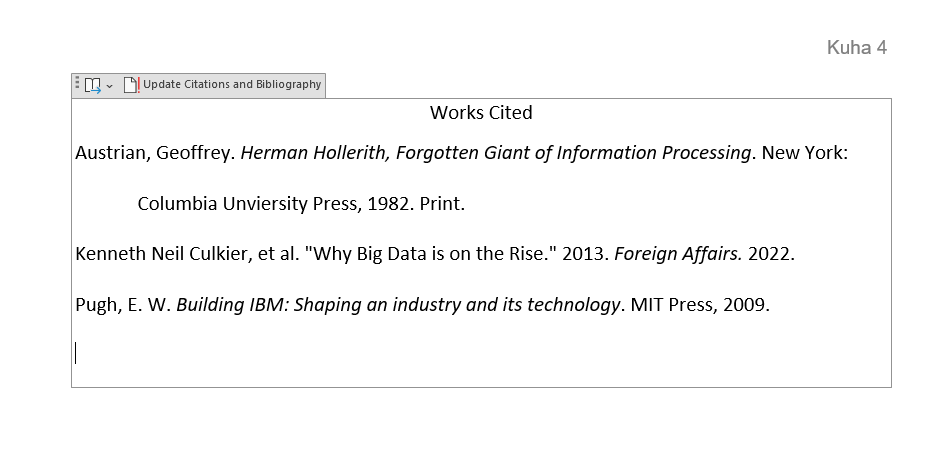
Works Cited
Let’s create a Works Cited page. This will be automatically generated by Word.
- Press Ctrl-End to automatically jump to the end of the document.
- Press Ctrl-Enter to create a page break.
-
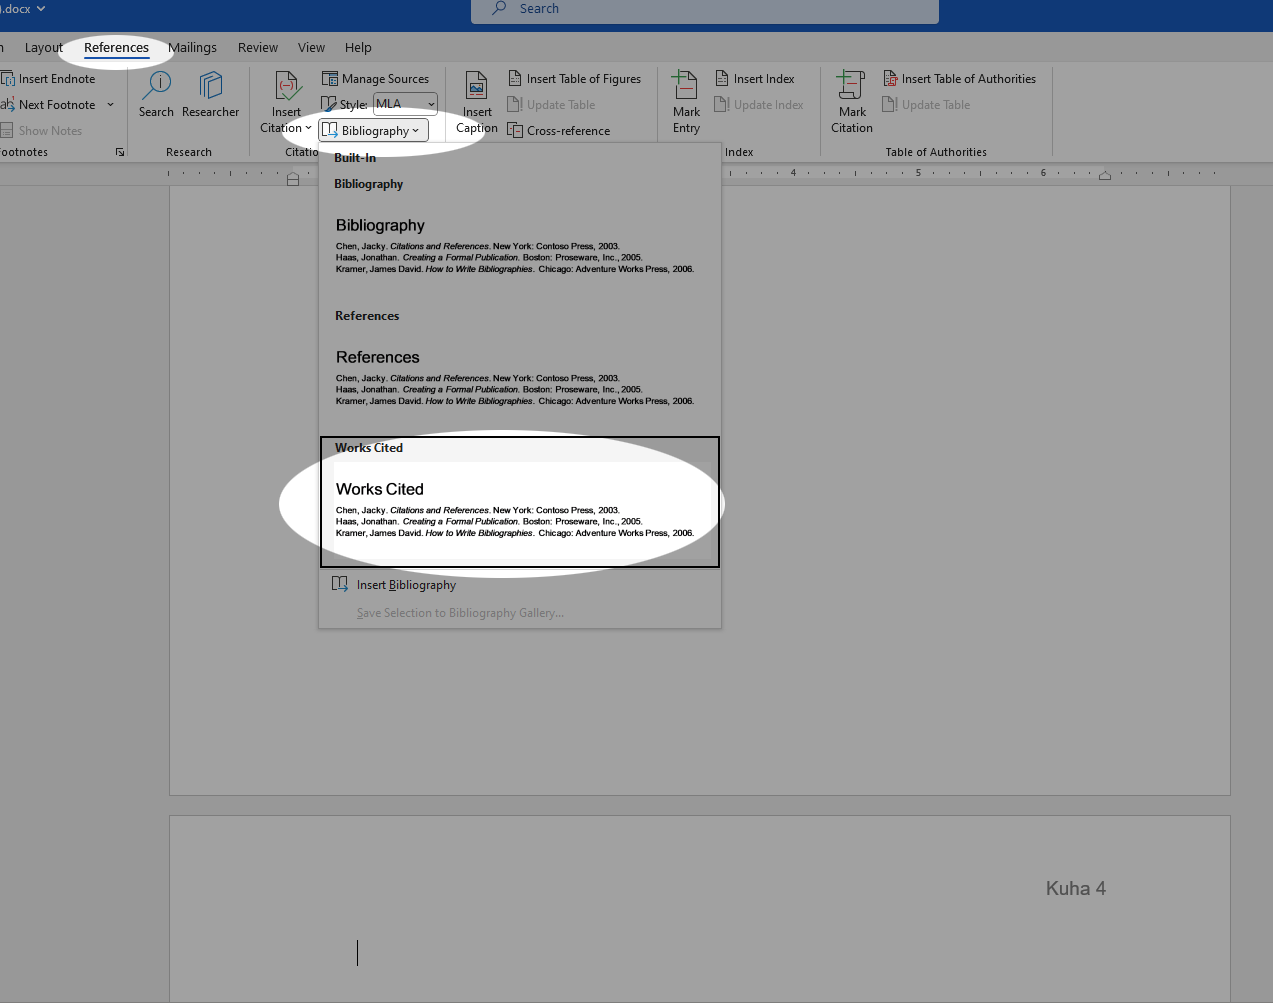
In the References tab, click the Bibliography tool and select Works Cited.
- Observe the result. The MLA style guide requires that this all be double spaced and that the title be the same font and size as the rest of the document as well as centered. Other than that, this is all perfect.
-
In order, the things you must do are:
- Center the title “Works Cited” and change its size to 12 pt.
- Select the rest of the Works Cited and bump its size to 12 pt.
- Then double-space the entire Works Cited page.
- Finally, select the entire Works Cited page and change the font to Calibri so it is the same as the rest of the document.
- If this is tricky, you can follow along in the video above.
Conclusion
That’s it. You’ve formatted it according to MLA style. The tutorial is complete. Submit it to Canvas as normal.